|
|
If you have a supported radio connected to your PC ( Mac and Linux users should read this), you will want to tell the program about your radio so that the logger can read and set the VFO for you.
From the main SKCCLogger window, select the "Options" menu item and then select "Configure Radio."
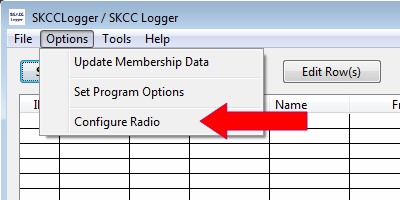
When you select the "Configure Radio" option, the "Radio Setup" window will open.
The "Config Name" pull-down menu provides you with a way of naming your radio configuration. Providing a unique name for your radio configuration is most useful when you have two or more radios that you use with the logger. However, even with one radio connected, you need to assign a name to the settings.
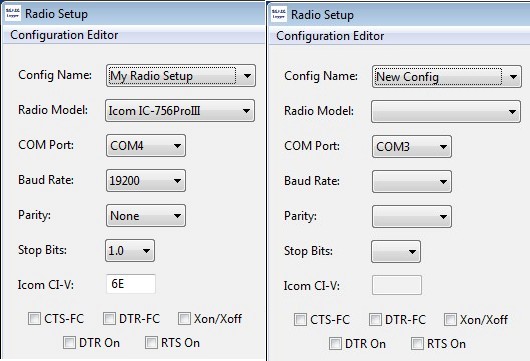
If you have previously had a radio connected with an early version of the SKCCLogger, that radio's setup will be recalled, preset, and will be given a default name of "My Radio Setup" as shown in the image below. You will be able to change the configuration name later. But for now, just continue.
If you have never configured a radio before, you will start with a "New Config." In this case, you will be prompted later (when you try to open the port) to provide a configuration name.
The two different initial scenarios are shown in the following screenshots:
Details on managing multiple radio configurations is provided in the Managing Multiple Radios chapter.
The following steps will connect the SKCCLogger program to your radio:
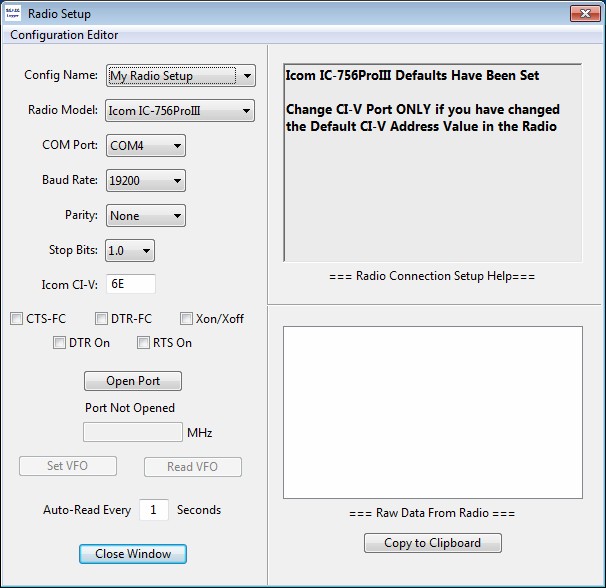
Some radio interfaces use either hardware or software "handshake" controls so that the radio can control when the PC can interact with it. The Radio Setup window provides options to select any of five different types of handshake interfaces. The checkbox options provide the following:
Once you have entered all required information, the "Open Port" button should be enabled. Click the button to open the port to the radio.
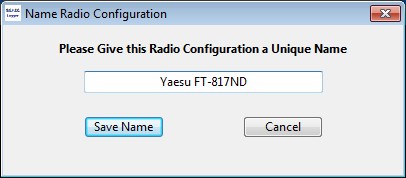
If you are setting up a "New Config," the program will prompt you to enter a name for the configuration. Enter any descriptive name you like. Just note that all radio configuration names must be unique and that "New Config" is a reserved name. Press the "Save Name" button when you have entered your configuration name.
If the COM port opened successfully, the message "Radio Port Opened" should appear under the "Open Port" button and the button should now be a "Close Port" button.
If the COM port failed to open, check your settings carefully and try again. A common reason (in fact the ONLY reason I have seen so far) for failing to open is that the COM Port is already in use by another program - maybe another logging program?
You should also be aware the a successful opening of the COM port ONLY means that the logger has connected to the port. Proper exchange of information through that port is a different challenge altogether.
If you are certain that all other settings are correct but you still cannot read or write to your radio's VFO-A frequency, you may want to experiment with various flow-control settings. Keep in mind, however, that opening a COM port on a PC does little more than connect the COM port to the program that opened the port. No data is actually passed at this point.
The next steps actually use the COM port to communicate with the radio.
Once you have opened the radio port, the next step is to test setting or reading the primary VFO.
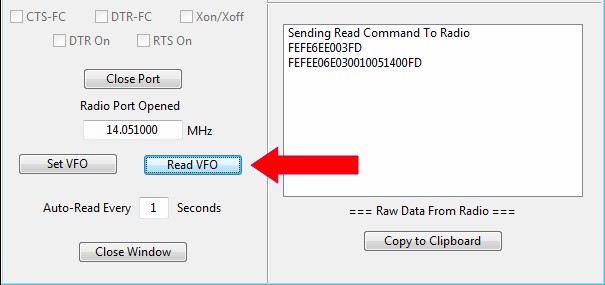
You might see some data displayed in the "Raw Data Received From Radio" text box, but it is probably not important to you. If the radio responds as expected, the frequency (in MHz) should display in the text box directly above the "Set VFO" and "Read VFO" buttons.
Note: The "Copy to Clipboard" button can be used to copy/paste all of the data displayed in the "Raw Data Received From Radio" to the Windows clipboard. In the event that you have problems with your radio interface, the software-support team may request that you send a copy of the data being sent from the radio. This button makes it easier to transfer the data to an email or text file.
If the COM port opened successfully, but you are unable to read or set the VFO, then you need to carefully check the various settings that you selected above:
Once you have set the COM port parameters correctly and have successfully read the VFO frequency, you should be able to enter a frequency into the text box and set your primary VFO.
When you are connected to a radio and start logging with "Auto Freq and Band" enabled, the program will periodically read the frequency from the radio. By default, the radio is polled for data every 15 seconds. You can specify a polling rate (in seconds) with a minimum of 1 second and a maximum of 999 seconds allowed. The default rate is once every 15 seconds.
When you have completed setting up your radio, click on the "Close Window" button to exit and leave the radio connected.
Don't worry about trying to remember the specific settings you used to connect to the radio - the program remembers the settings in its initialization file.
When you exit from the Radio Setup Dialog window, the main logging window should reappear.
Next chapter: Starting a Log File